Manage Azure VMs from AWS - Thu, Mar 16, 2017
Use AWS Simple Systems Manager to keep your Azure Windows VMs updated for free
Managing lots of Azure VMs is a task for a configurations manager since Azure itself doesn’t offer any managed service to handle this task. I have for example used Chef and Puppet for this and it works really well. My instances get the correct updates installed, users are created and I can also roll out new updates.
But there must be a simpler way - right?
In comes Amazon Web Services (AWS) with their new enterprise managed service called Simple Systems Manager (SSM). It’s a free service to use if you want to centrally manage instances on AWS or on-premise. The interesting bit is that it works in other clouds such as Azure as well.
AWS SSM lets you remotely and for free:
- Create a way to remotely manage your VMs from one location using the same tools or scripts
- Centralize access control
- Centralize auditing and your view into the actions performed on your servers
- Centralize monitoring with CloudWatch Events
- Get notifications about the progress through AWS SNS
Your VMs on-prem will be listed in the same place as your AWS instances after installing the Simple Systems Manager client, which makes managing a hybrid solution quite simple.
Requirements
- Windows server 2003-2016
- Ubuntu Server 16.04 LTS, 14.04 LTS, or 12.04 LTS
- Red Hat Enterprise Linux (RHEL) 6.5 or later
- CentOS 6.3 or later
Simple systems manager setup
- First create a Amazon web services account if you don’t already have one. It is free.
- Create an IAM service role for SSM. You can use this cloudformation on my github: https://github.com/hmain/awsSsm/blob/master/ssmRoles.yml
- Open the Amazon EC2 console, expand Systems Manager Shared Resources in the navigation pane, and choose Activations.
- Choose Create an Activation.
- Fill out the form and choose Create Activation.
Install the AWS SSM client on your instances
$AWS_REGION = "eu-west-1"
$AWS_ACTIVATION_CODE = "code_from_AWS_activation"
$AWS_ACTIVATION_ID = "id_from_AWS_activation"

$dir = $env:TEMP + "\ssm"
New-Item -ItemType directory -Path $dir
cd $dir
(New-Object System.Net.WebClient).DownloadFile("https://amazon-ssm-$AWS_REGION.s3.amazonaws.com/latest/windows_amd64/AmazonSSMAgentSetup.exe", $dir + "\AmazonSSMAgentSetup.exe")
Start-Process .\AmazonSSMAgentSetup.exe -ArgumentList @("/q", "/log", "install.log", "CODE=$AWS_ACTIVATION_CODE", "ID=$AWS_ACTIVATION_ID", "REGION=$AWS_REGION") -Wait
Get-Content ($env:ProgramData + "\Amazon\SSM\InstanceData\registration")
Get-Service -Name "AmazonSSMAgent"
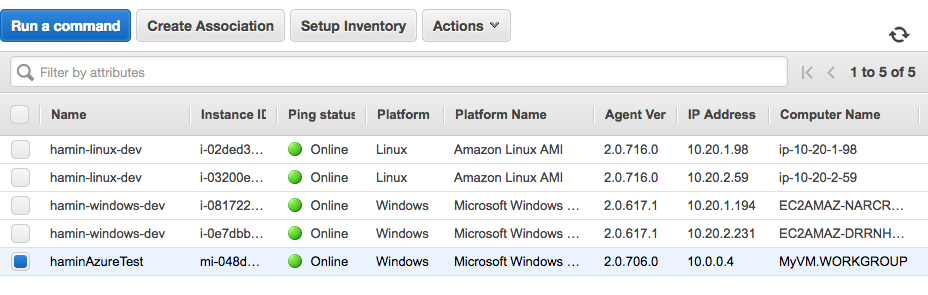
The server or VM is now a managed instance. In the AWS EC2 Systems manager Managed Instances console, these instances are listed with the prefix “mi-” like this:
For more information about hybrid AWS SSM setup, see: http://docs.aws.amazon.com/AWSEC2/latest/UserGuide/systems-manager-managedinstances.html